Hi everyone!
Welcome to my first floristry how to guide.
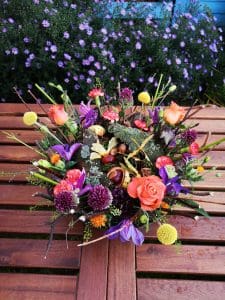
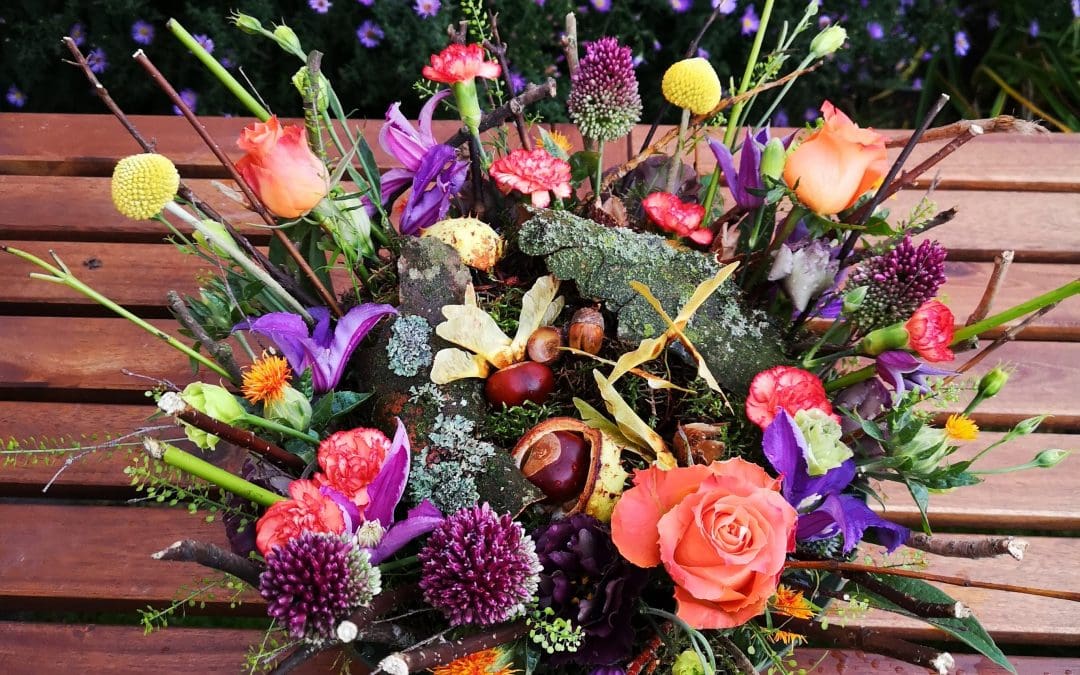
It’s got some serious Autumn vibes! Gorgeous movement and textures, pretty blooms and features some lovely natural, rustic woodland walk finds to finish it off nicely!
So let’s get started…
First of all guys this is not a cheap design, however it’s very striking and fairly long lasting. You can also reuse the twigs and bowl after the flowers have finished to create a festive winter version of this design using evergreen foliage and Christmas decorations!
Flowers/ foliage/ sundries
– 3x Allium sphaerocephalon
– 2x Spray carnations, orange
– 1x Carthamus tinctorius
– 2x Clematis pirouette
– 3x Craspedia globosa
– 1 x Lisianthus Roseanne
– 3 x Rosa ‘Juliscuka’
– 1 x Thaspi Green bell
– 1x Erygium Orion
– Bunch of moss
– Selection of foraged twigs of assorted sizes and colours, like dogwood
– Selection of foraged Autumn goodies such as seed pods, pine cones, acorn, bark etc.
– 2x blocks oasis foam
– 1x oasis round ‘top hat’ designer dish
– Floristry wire
You can use different flowers and colours. Just remember to choose a variety of different textures and shapes to create rhythm in your design. Colours that compliment each other will help create harmony.
Construction
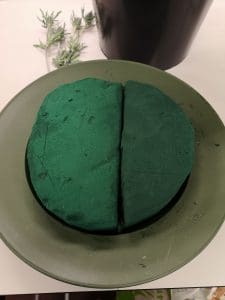
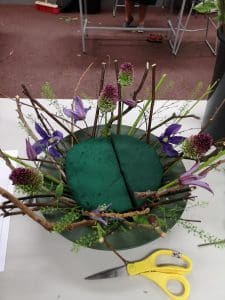
– First you need to soak your floral foam
– Next carve two half moon shapes out of your foam using a florist knife. Wedge foam into container, making sure it is secure.
– Cut foraged twigs to desired length and create your basket frame. I cut 18 lengths and made 9 pairs around the edge of the foam. Put them in at an angle, fanning outwards to create a basket. Makes sure you are working into the sides of the foam.
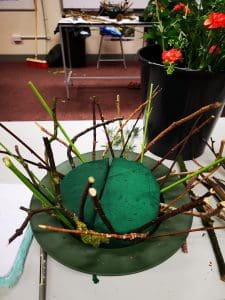
– Now add some more twigs to fill in gaps. Different thicknesses of twigs, colours and textures work well here to soften the design.
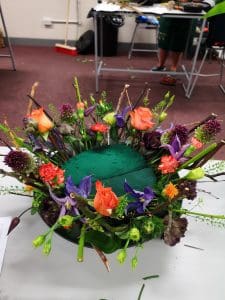
– Next it’s time to start adding your flowers, starting with foliage. Still working into sides and edges of foam (Don’t put anything in the middle that’s where your Autumn finds go)! Insert pieces of the Thaspi into the foam, weaving it in and around the twigs to create a wild look.
– Now add your flowers, starting with you larger focal blooms, Allium, Clematis and Roses. Add the flowers in at different heights to create interest and space out the colours to create good rhythm and colour balance.
– Carry on adding the other flowers, Carnations, Lisianthus and Carthamus thinking about colour balance, different shapes and textures. Try to keep the buds, especially the Lisianthus and smaller flowers on longer stems and place towards the outer edge of design and the more open larger blooms lower down in the design this creates good graduation.
– Add in your 3 Craspedia as a pop of colour. Try to create a triangle with them to draw the eye around the design.
– Finish off the flower placement with your Erygium and spare pieces of foliage to cover any exposed foam on outside of the design.
– Bend some .71mm wire into little hair pin shapes and use it to pin some moss into centre of design and some in and around the flowers and twigs where you can see gaps. This adds to the rustic feel of the design and also helps the foam to retain moisture.
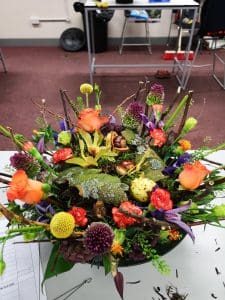
– Finally place your Autumn foraged finds into the centre of your design.
– Stand back and admire!
This would make a gorgeous centrepiece for a wedding or pretty seasonal coffee table design at home or in a reception area.
This is a level 3 creative crafts standard design that I produced during my evening Floristry class at Birmingham Botanical Gardens.
Recent Comments